10 Stunning Short Square French Tip Nail Designs You’re Going to Love
- Nails design
Maria
- 0
- 35 minutes read

Short square French tip nails are a chic and fresh take on a classic manicure. Perfect for those who love a clean and polished look, this style features squared-off tips in a lighter shade, set against a neutral base color. They’re versatile enough to suit any occasion, whether you’re at the office or out on the town. Plus, the shorter length makes them easy to maintain while still looking stylish!
Geometric Patterns on Tips

Geometric patterns on short square French tip nails bring a modern twist to a classic look. With a mix of bold shapes and colors, these designs not only make your nails stand out but are surprisingly simple to achieve. Whether you’re going for a chic look at the office or a fun vibe for a night out, these nails are versatile and stylish.
The best part? You don’t need to be a nail art expert to create stunning geometric designs. With a few basic tools and some creativity, you can turn your nails into a canvas. Ready to give it a try? Here’s a fun and easy recipe to get started.
Ingredients
- Base coat
- White nail polish
- Black nail polish
- Red nail polish
- Pink nail polish
- Striping tape
- Top coat
Instructions
- Prep Your Nails: Start with clean, dry nails. Apply a base coat to protect your natural nails.
- Apply Base Color: Paint your nails with white nail polish as the base color. Allow it to dry completely.
- Add Geometric Shapes: Use striping tape to create your desired geometric patterns. For example, you can make triangles, lines, and dots using black, red, and pink nail polish.
- Fill in Colors: Carefully paint over the striping tape with your chosen colors. Make sure to let each section dry before removing the tape.
- Finish with Top Coat: Once your design is dry, seal it with a top coat for shine and protection.
Floral Design on French Tips
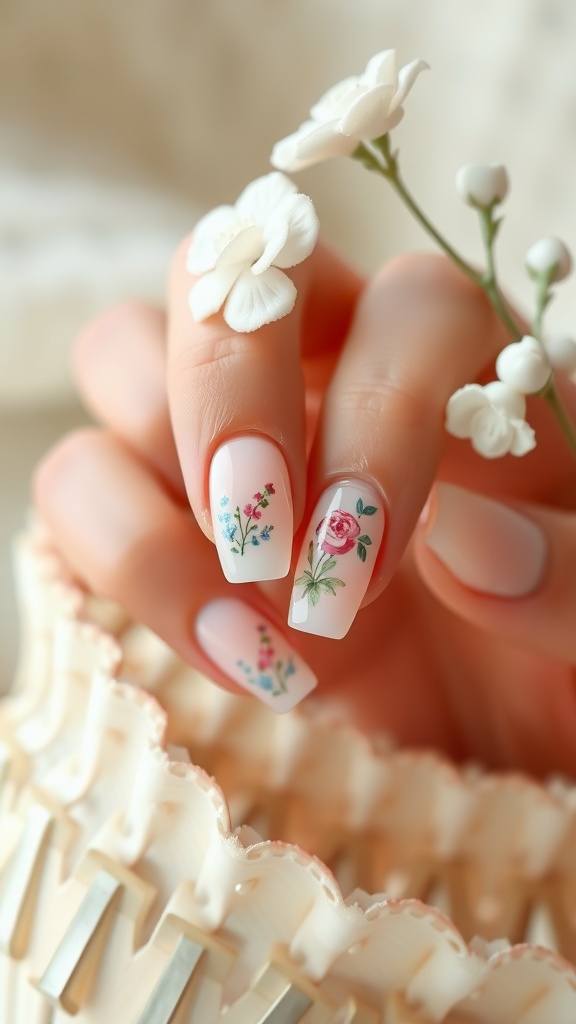
Floral designs on French tip nails bring a fresh and cheerful vibe to your manicure. This style combines the classic elegance of French tips with the whimsical beauty of flowers, making it perfect for any occasion, from casual outings to festive celebrations. The soft pastel colors and delicate floral patterns create a charming look that is both stylish and approachable.
Creating floral designs on French tips is straightforward and fun! All you need are some basic nail supplies and a little creativity. Whether you’re a beginner or a seasoned nail art enthusiast, you can achieve stunning results that will surely catch everyone’s eye. It’s a great way to express your personality and bring a touch of nature to your nails.
Ingredients
- Base coat
- Neutral nail polish (for the French tips)
- Pastel colors for floral designs
- Nail art brush or dotting tool
- Top coat
- Nail tape (optional)
Instructions
- Start with clean, dry nails and apply a base coat to protect your natural nails.
- Once the base coat is dry, paint your nails with a neutral polish, ensuring an even layer for the French tips.
- Using nail tape, create a straight line about one-third down from the tip of your nails to define where the French tips will be.
- Paint the tips with your chosen color, ensuring it’s even and covers the area well. Remove the tape while the polish is still wet for a clean line.
- Once the tips are dry, use a nail art brush or dotting tool to create small flowers and leaves using your pastel colors. Get creative with different floral patterns.
- After the design has dried completely, apply a top coat to seal your work and add shine.
- Allow everything to dry thoroughly before you show off your beautiful floral French tips!
Matte Finish Short Square French Tips

Short square French tips are a trendy nail design that combines a classic look with a modern twist. With their matte finish, they offer a chic and sophisticated appearance, perfect for any occasion. This design is not only stylish but also simple to achieve, making it a favorite among nail enthusiasts.
The soft nude base paired with crisp white tips creates a pleasing contrast that is both timeless and fresh. Whether you’re getting ready for a special event or just want to elevate your everyday style, these nails are a great choice.
Ingredients
- Nail file
- Nail buffer
- Nude nail polish
- White nail polish
- Matte top coat
Instructions
- Start by shaping your nails into a short square shape using a nail file.
- Buff the surface of your nails to ensure a smooth finish.
- Apply a base coat to protect your nails and allow it to dry.
- Paint your nails with the nude polish, applying a second coat for full coverage if necessary.
- Once dry, use the white polish to create a straight line across the tips of your nails, ensuring they are uniform.
- Finish with a matte top coat to give your nails that stylish matte look.
- Let everything dry completely before showing off your chic new nails!
Read More : 10 Stunning Colored French Tip Nail Designs to Try Now
Glittery French Tip Accents

Short square French tip nails with glittery accents are a fun and stylish choice for any occasion. The subtle elegance of the classic French manicure is beautifully enhanced by the addition of sparkling glitter, making your nails stand out without being over the top. This look combines simplicity with a touch of glam, making it both easy to achieve and delightful to wear.
Creating this design is simple, and you don’t need to be a nail artist to pull it off! With just a few products, you can elevate your nail game and enjoy a chic manicure that turns heads. Here’s how you can create your own glittery French tip nails.
Ingredients
- Base coat
- Sheer pink nail polish
- White nail polish
- Fine glitter polish or loose glitter
- Top coat
- Nail art brush or striping tape (optional)
Instructions
- Start with clean, dry nails and apply a base coat to protect them.
- Once the base coat is dry, apply two coats of sheer pink nail polish, allowing each coat to dry completely.
- Next, apply white nail polish to the tips of your nails. You can use a nail art brush for precision or striping tape for clean lines.
- While the white polish is still wet, sprinkle fine glitter on the tips or apply glitter polish for a more concentrated look.
- Let everything dry before sealing your design with a top coat for shine and longevity.
Pastel Ombre French Tips
Pastel ombre French tips are a chic and playful twist on the classic French manicure. They blend soft pastel colors for a trendy gradient effect, making your nails look fresh and fun. This style is perfect for any occasion, whether you’re dressing up for a night out or keeping it casual.
Creating this look is simple and requires minimal supplies. You can customize the colors to suit your mood or the season. Plus, it’s a great way to express your creativity while keeping your nails looking polished and elegant!
Ingredients
- Base coat
- Pastel nail polishes (e.g., pink, blue, lavender)
- White nail polish
- Top coat
- Makeup sponge
- Nail art brush (optional)
Instructions
- Prep Your Nails: Start with clean, dry nails. Apply a base coat to protect them.
- Apply Base Color: Choose a pastel color as your base and paint all your nails. Let them dry completely.
- Create the Ombre Effect: On a makeup sponge, apply two or three pastel shades side by side. Lightly dab the sponge onto the tips of your nails, blending the colors as you go.
- Finish with White Tips: Once the ombre effect is dry, use a nail art brush or tape to create a white tip at the end of each nail.
- Seal the Look: Add a top coat to protect your design and enhance shine.
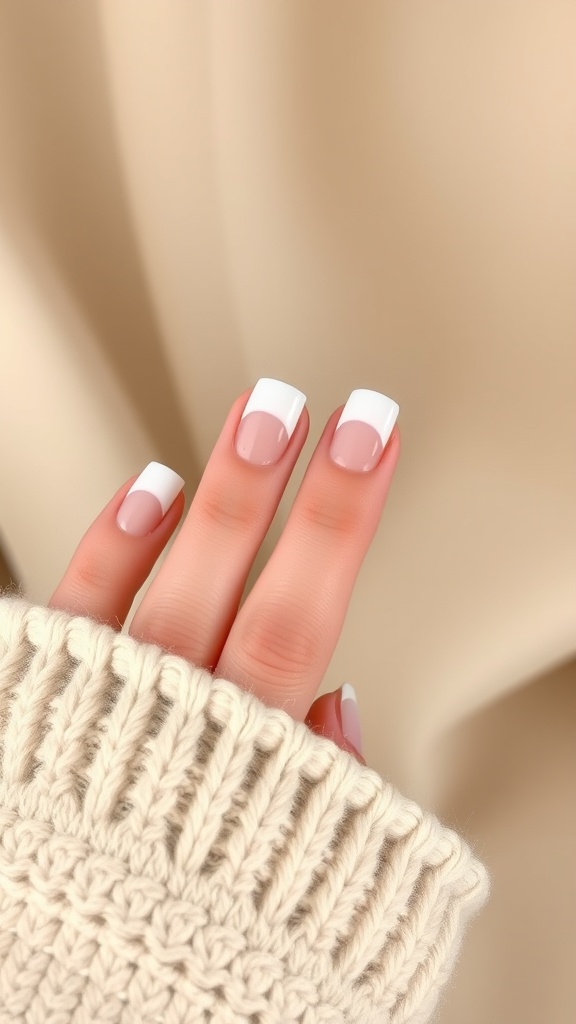
Minimalist Short Square French Tips

Short square French tips are a stylish and easy way to achieve a polished look without the fuss of intricate designs. This minimalist nail art features a clean, natural base with crisp white tips, making it perfect for any occasion—whether you’re at work or enjoying a night out. The simplicity of this style means it’s suitable for anyone, regardless of nail length or shape.
Not only is this design chic and trendy, but it’s also simple to recreate at home. With just a few basic tools and a little practice, you can achieve that salon-fresh look right in your own space. Ready to get started? Here’s a straightforward recipe to create your own minimalist short square French tips!
Ingredients
- Base coat nail polish
- White nail polish (for tips)
- Top coat nail polish
- Nail file
- Nail buffer
- Nail polish remover
Instructions
- Prep Your Nails: Start by filing and shaping your nails into a square. Buff the surface lightly to create a smooth canvas for the polish.
- Apply Base Coat: Apply a thin layer of base coat and allow it to dry completely. This will protect your nails and help the polish adhere better.
- Create the Tips: Use the white nail polish to paint the tips of your nails. You can use a nail brush or tape for precision, depending on your comfort level. Allow it to dry before moving on.
- Seal with Top Coat: Once the white polish is dry, apply a top coat to give your nails a glossy finish and make the design last longer.
- Cleanup: Use nail polish remover and a brush or cotton swab to clean up any mistakes around the edges.
Read More : 10 Stunning Colored French Tip Nail Designs to Try Now
Bold Colored French Tips

Bold colored French tips are a fun twist on the classic manicure, offering a vibrant pop that can easily brighten your day. This look combines traditional white tips with striking colors, making it perfect for anyone looking to express their personality through their nails. Best of all, this style is simple to achieve at home, allowing you to customize your colors and shapes to your liking.
To get started, you’ll need a few basic nail supplies. The result is not only stylish but also allows for creativity. Whether you prefer soft pastels or bright hues, these bold French tips can fit any mood or occasion.
Ingredients
- Nail polish in your chosen bold colors
- White nail polish for tips
- Base coat
- Top coat
- Nail tape or striping tape (optional)
Instructions
- Start with clean, dry nails. Apply a base coat to protect your nails and help the polish adhere better.
- Choose your bold color and apply two coats, allowing each coat to dry completely in between.
- If you’re using nail tape, apply it to create a clean line for your tips. If not, you can freehand the tips with the white polish.
- Using the white nail polish, carefully paint the tips of your nails. Make sure they are even and let them dry.
- Finish with a top coat to seal your design and add shine. Allow it to dry fully before using your hands.
Elegant White Short Square French Tips
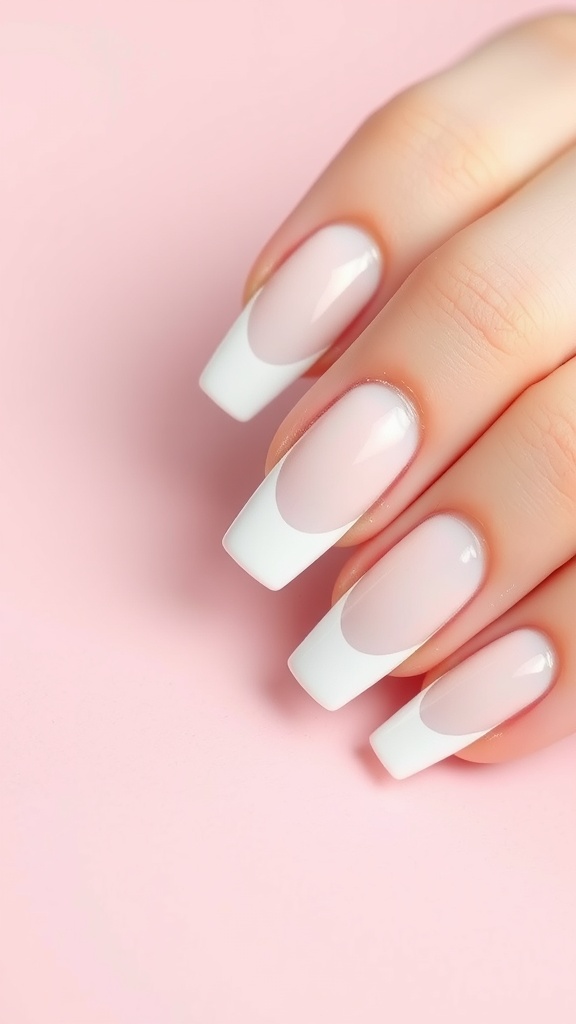
The short square French tip nails are a classic choice that brings a touch of chic sophistication to any look. With their crisp white tips and smooth, polished surfaces, they are perfect for everyday wear or special occasions. Plus, they are quite easy to achieve, making them a go-to option for nail enthusiasts.
This style combines simplicity and elegance, offering a fresh and clean aesthetic. Whether you prefer them in a matte or glossy finish, short square French tips are versatile and can complement any outfit. Let’s dive into how you can create your own stunning set at home!
Ingredients
- Base coat
- White nail polish
- Light pink or nude nail polish
- Top coat
- Nail file
- Nail buffer
- Nail tape (optional)
Instructions
- Prepare Your Nails: Start by filing your nails into a square shape and buffing the surface to create a smooth base.
- Apply Base Coat: Apply a thin layer of base coat to protect your natural nails and enhance adhesion.
- Paint the Base Color: Once the base coat is dry, apply two coats of light pink or nude nail polish to the entire nail, allowing each layer to dry completely.
- Create the Tips: Use nail tape to outline the tips or freehand the white polish. Make sure the tips are even on each nail.
- Apply White Polish: Carefully paint the tips with white nail polish. For a clean look, you may want to do two coats, letting each coat dry in between.
- Finish with Top Coat: After the white polish is dry, apply a top coat to add shine and protect your nails.
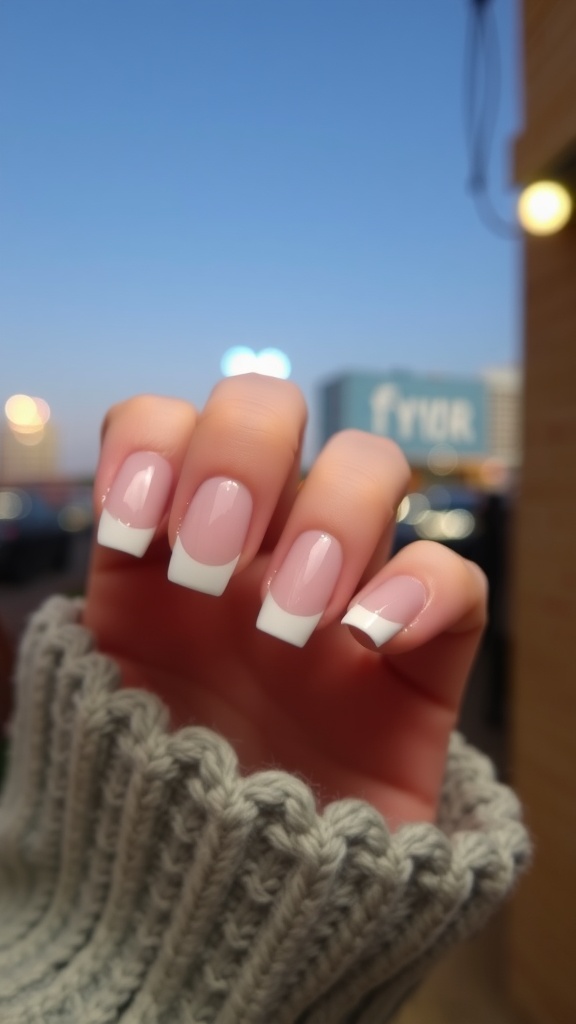
Nude Base with Classic French Tips
This style showcases a nude base that perfectly complements the chic, white tips. It’s a timeless look that adds a touch of elegance to any outfit, making it suitable for both casual and formal occasions. The combination is simple yet stylish, making it a favorite among nail art enthusiasts.
Creating this look is quite easy and doesn’t require advanced skills. With some practice, you’ll be able to achieve salon-quality results right at home. The nude base offers a versatile canvas, while the classic French tips add just the right amount of flair!
Ingredients
- Nail polish in a nude shade
- White nail polish for tips
- Base coat
- Top coat
- Nail tape or striping brush (optional)
Instructions
- Start with clean, dry nails. Apply a base coat to protect your natural nails.
- Paint your nails with the nude polish, ensuring even coverage. Allow it to dry completely.
- If using nail tape, place it to cover the tip area of your nails to create a clean line. If using a striping brush, carefully paint the tips with white polish.
- Once the white polish is dry, carefully remove any tape if used, and clean up the edges if necessary.
- Finish with a top coat for shine and durability, letting everything dry thoroughly.
Read More : 10 Stunning Milky French Nail Designs to Try This Season
Seasonal Themed French Tips
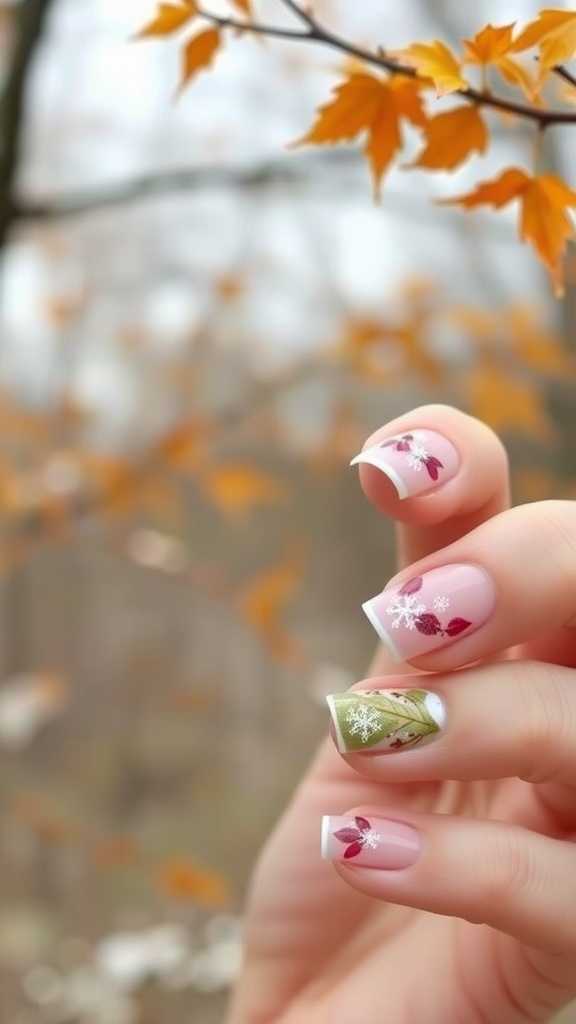
Seasonal themed French tips are a fun and stylish way to express your love for the changing seasons. With simple designs inspired by nature, like delicate leaves or snowflakes, these nails add a personal touch to your manicure. They’re easy to create, making them perfect for both beginners and those looking to switch up their look!
This recipe for seasonal themed French tips combines vibrant colors and simple techniques to bring the beauty of each season right to your fingertips. Whether it’s the warm tones of autumn or the cool shades of winter, you can customize your nails to match the vibe of the season.
Ingredients
- Nail base coat
- Pastel pink nail polish
- White nail polish
- Green nail polish
- Red nail polish
- Small nail art brush or dotting tool
- Top coat
Instructions
- Start with clean, dry nails and apply a base coat to protect your nails.
- Once the base coat is dry, paint your nails with a pastel pink polish. Let it dry completely.
- Using a small brush or dotting tool, create a French tip with white polish at the edge of each nail.
- For the accent nail, paint it with green polish and add small red leaf designs using the red polish.
- Finish with a top coat to seal the design and add shine.


